
Eureka 是 Netflix 公司出品的实现服务注册和发现的工具,覆盖了服务发现、服务注册、服务下线、服务续约、服务同步等多种功能,其体系包含服务端和客户端,它们之间使用 RestAPI 接口通信,因此我们也可以使用其他语言作为客户端。Spring Cloud 对 Eureka 进行了集成,使其仅需在依赖中引入一个 starter 即可使用。
创建单节点注册中心
创建 Spring Cloud 项目并加入依赖
     <dependency>
         <groupId>org.springframework.boot</groupId>
         <artifactId>spring-boot-starter-actuator</artifactId>
     </dependency>
创建启动类
EurekaServer.java,需要在启动类中增加@EnableEurekaServer开启 EurekaServer 功能。@SpringBootApplication @EnableEurekaServer public class EurekaServer { public static void main(String[] args) { SpringApplication.run(EurekaServer.class, args); } }在类路径下创建
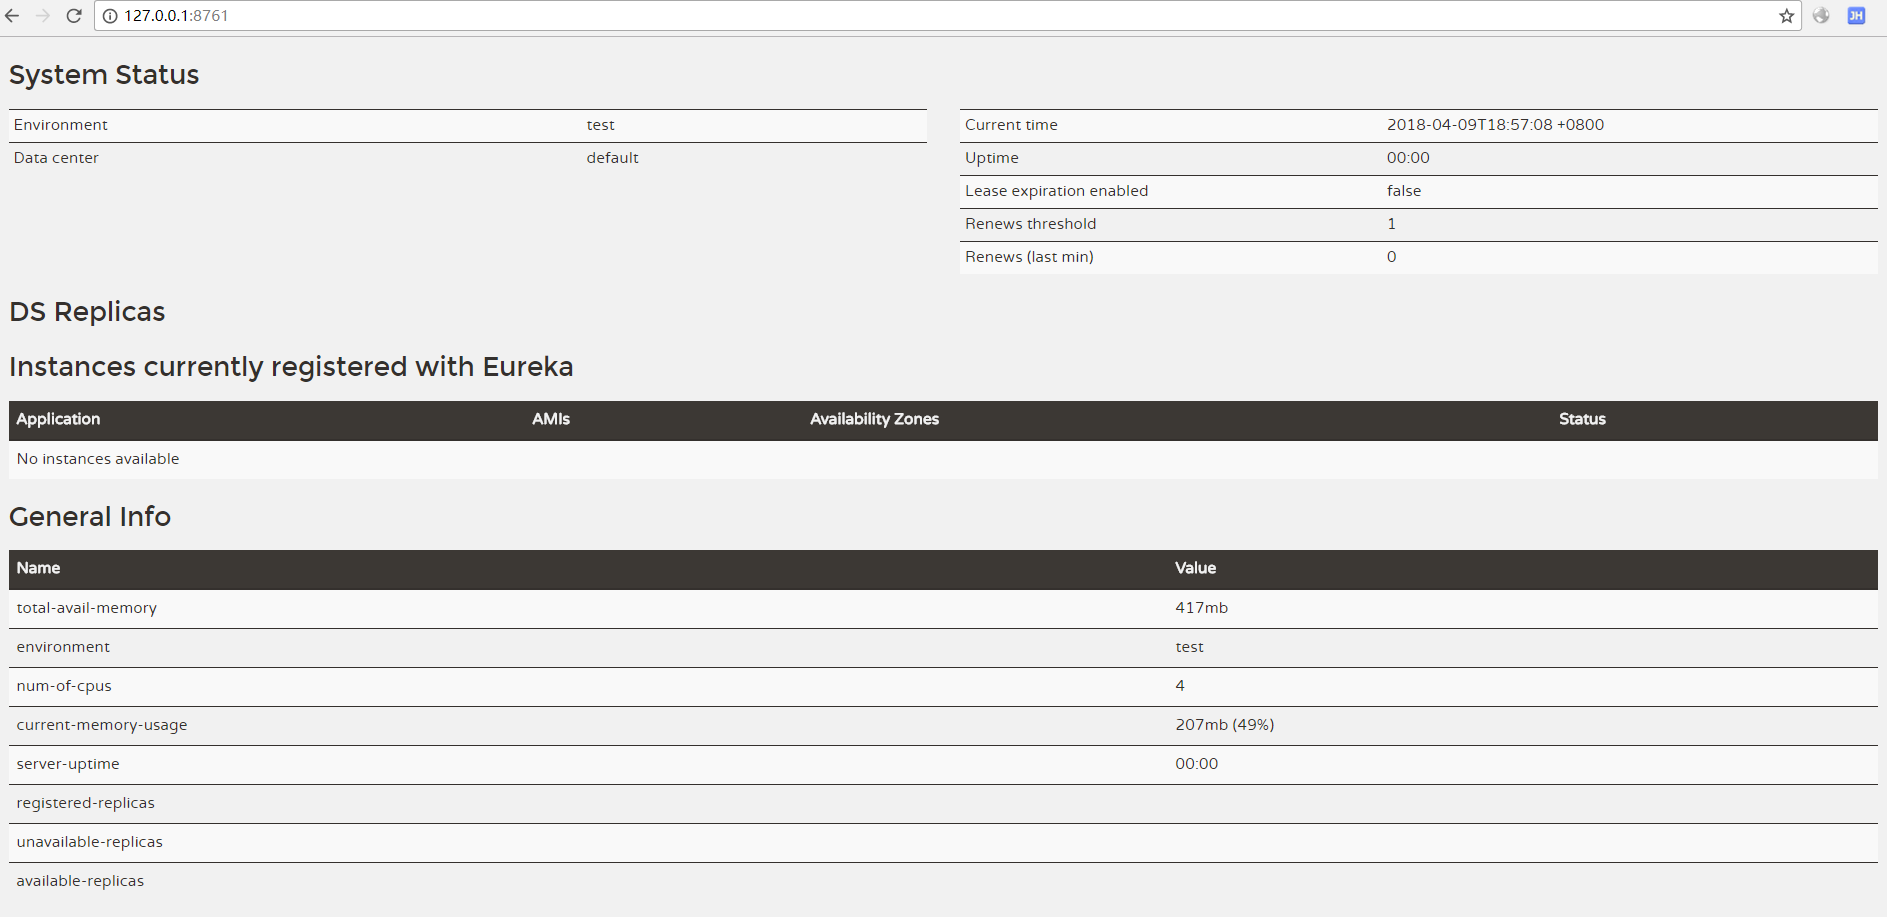
application.yml# 服务注册中心名字 spring.application.name: eureka-server # 服务注册中心实例端口号 server.port: 8761 eureka: instance.hostname: localhost # 服务注册中心实例的主机名 client: registerWithEureka: false # 是否向服务注册中心注册自己 fetchRegistry: false # 是否从服务注册中心发现服务 serviceUrl.defaultZone: http://${eureka.instance.hostname}:${server.port}/eureka/ # 服务注册中心的配置内容,指定服务注册中心的位置运行启动类,现在一个单节点的 Eureka 实例就创建好了,访问 http://127.0.0.1:8761/ 看下效果
创建高可用注册中心集群
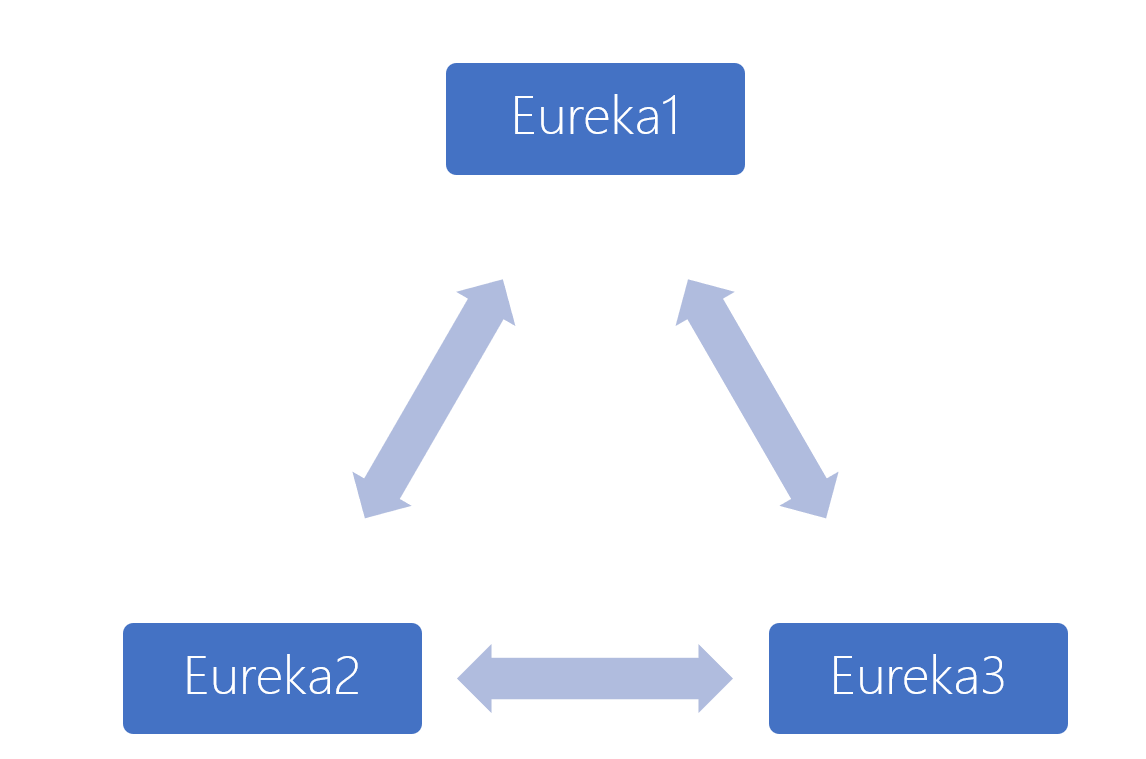
Eureka Server 的高可用就是将自己也作为服务提供方注册到其他 Eureka 节点上,这样构成的集群任意两个节点间都是相互注册的,其他服务提供方将自己注册到任意 Eureka 节点都会被同步到其他 Eureka 节点,以实现服务清单的相互同步,这样组建的集群只要有一个 Eureka 节点运行正常就可以保证集群运行正常。
与创建单节点实例相比,创建 3 节点的 Eureka Server 集群需要简单修改下程序:
由于我们在本地启动 3 个 Eureka 实例需要 3 个 host ,我们在系统 hosts 文件中添加
127.0.0.1 eureka1 eureka2 eureka3创建 3 个启动类:
@SpringBootApplication @EnableEurekaServer public class EurekaServer1 { public static void main(String[] args) { SpringApplication.run(EurekaServer1.class, "--spring.profiles.active=peer1"); } }@SpringBootApplication @EnableEurekaServer public class EurekaServer2 { public static void main(String[] args) { SpringApplication.run(EurekaServer2.class, "--spring.profiles.active=peer2"); } }@SpringBootApplication @EnableEurekaServer public class EurekaServer3 { public static void main(String[] args) { SpringApplication.run(EurekaServer3.class, "--spring.profiles.active=peer3"); } }在类路径下创建 3 个配置文件:
# 服务注册中心名字 spring.application.name: eureka-server # 服务注册中心实例端口号 server.port: 8771 eureka: instance: hostname: eureka1 # 服务注册中心实例的主机名 instance-id: ${spring.cloud.client.ipAddress}:${server.port} # 服务注册中心的实例 id client: registerWithEureka: true # 是否向服务注册中心注册自己,集群模式下需要设置为 true 以将自己注册到其他 Eureka Server 节点 fetchRegistry: true # 是否从服务注册中心发现服务 serviceUrl.defaultZone: http://eureka2:8772/eureka/,http://eureka3:8773/eureka/ # 服务注册中心的配置内容,指定服务注册中心的位置# 服务注册中心名字 spring.application.name: eureka-server # 服务注册中心实例端口号 server.port: 8772 eureka: instance: hostname: eureka2 # 服务注册中心实例的主机名 instance-id: ${spring.cloud.client.ipAddress}:${server.port} # 服务注册中心的实例 id client: registerWithEureka: true # 是否向服务注册中心注册自己,集群模式下需要设置为 true 以将自己注册到其他 Eureka Server 节点 fetchRegistry: true # 是否从服务注册中心发现服务 serviceUrl.defaultZone: http://eureka1:8771/eureka/,http://eureka3:8773/eureka/ # 服务注册中心的配置内容,指定服务注册中心的位置# 服务注册中心名字 spring.application.name: eureka-server # 服务注册中心实例端口号 server.port: 8773 eureka: instance: hostname: eureka3 # 服务注册中心实例的主机名 instance-id: ${spring.cloud.client.ipAddress}:${server.port} # 服务注册中心的实例 id client: registerWithEureka: true # 是否向服务注册中心注册自己,集群模式下需要设置为 true 以将自己注册到其他 Eureka Server 节点 fetchRegistry: true # 是否从服务注册中心发现服务 serviceUrl.defaultZone: http://eureka2:8772/eureka/,http://eureka1:8771/eureka/ # 服务注册中心的配置内容,指定服务注册中心的位置分别运行 3 个启动类,现在一个 3 单节点的 Eureka Server 集群就创建好了,访问 http://127.0.0.1:8771/ 看下效果
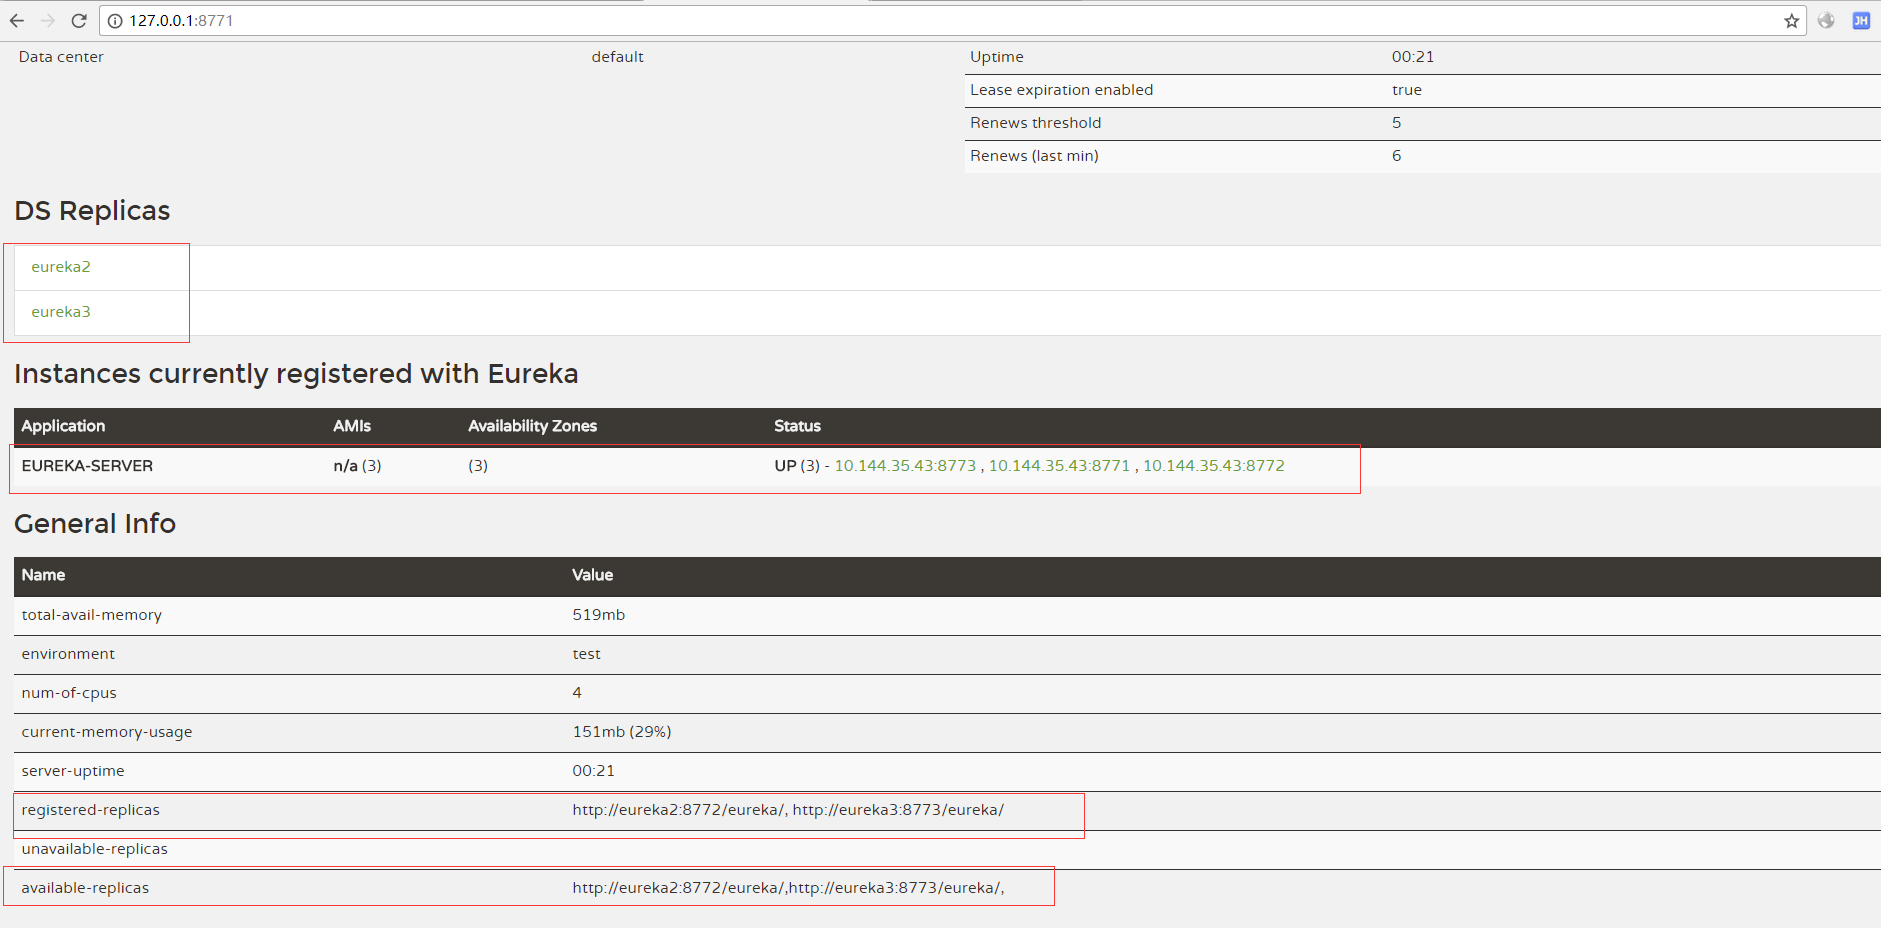
你可以访问 http://127.0.0.1:8772/、http://127.0.0.1:8773/ 看下其他两个节点的状态。
其他
更多配置可以参考项目依赖 spring-cloud-netflix-eureka-server-${version}.jar 中 META-INF/spring-configuration-metadata.json 或 spring-cloud-netflix 源码
